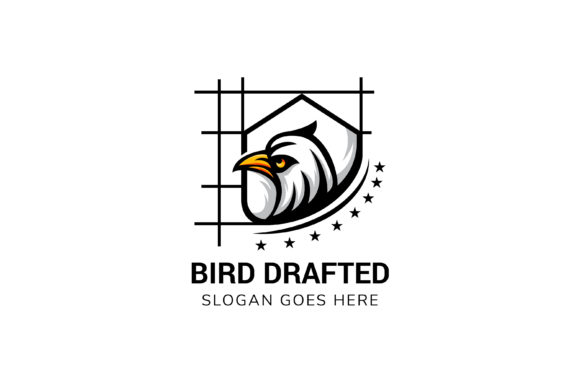
Eagle Drafted Contractor Logo: Embroidery Design Review
Whenever I pull up a new graphic for a potential embroidery project, I’m not just looking at how it feels on the screen. I’m already picturing the thread path, the puckering risks, the way sunlight will catch the final stitch. The Eagle Drafted Contractor Logo immediately caught my attention because it blends two strong visual languages—the bold power of a bald eagle and the precise, technical feel of a construction draft. That combination is conversation-starting on a finished product, but only if it’s handled with a clear understanding of embroidery realities.
Right off the bat, the file comes with a few promises that matter in a professional workflow: it’s a 100% vector graphic, delivered at 300dpi, well organized, and the text is fully editable. For anyone who digitizes their own designs, that’s a relief. You’re not fighting pixelation or guessing at outlines. The crisp lines mean you can trace and convert with confidence, and the editable text layer means you can swap “Eagle Drafted” for a real contractor’s name without rebuilding the whole composition. That alone makes the Eagle Drafted Contractor Logo highly practical for custom client work.
The Weight of the Eagle and the Drafting Lines
At first glance, the design gives off a rugged, professional mood. The eagle is not a delicate, airbrushed illustration—it reads like a solid emblem, the kind of logo you’d see on a work jacket, a heavy-duty tote bag, or the side of a hard hat. The draft construction lines behind the eagle add a layer of meaning: this isn’t just a patriotic bird, it’s a symbol for a builder, a roofer, a general contractor, or a handyman who takes pride in structural integrity. That dual theme makes the Eagle Drafted Contractor Logo feel intentional and story-driven, not generic.
From a digitizing perspective, the eagle’s silhouette and the surrounding draft elements present a mix of broad fill areas and thin, angular linework. The feathers are stylized enough to avoid a mess of tiny stitches, but the draft lines—those fine, intersecting arcs and measurement marks—are exactly the kind of detail that can vanish or become a tangled nest of thread if the design is reduced too far. I’d want to keep this design at a minimum of 3.5 to 4 inches wide for a clean stitch-out. Anything smaller, and those crisp draft lines start to blur into a single dense blob.
Testing the Design on a Real Contractor’s Tote
To put this review into practice, I decided to mentally run the Eagle Drafted Contractor Logo through a typical custom order: a set of canvas tote bags for a local construction company. The client wanted a rugged, reusable bag they could give to crew members and clients—something that looked like a badge of reliability. The eagle with the draft background felt like a perfect fit. The editable text meant I could punch in their company name and even add a small tagline, all without touching the core graphic.
I started by opening the vector file in my embroidery software. Because it’s well organized, I could isolate the eagle, the draft lines, and the text into separate layers. That’s a huge advantage. I set the eagle silhouette as a medium-density fill stitch, using a dark navy thread for the body and a warm gold for the beak and eye. The draft lines I converted to a running stitch with a slight increase in thickness—just enough to survive the texture of the canvas. On a tote bag, you’re working with a sturdy, somewhat uneven surface, so thin satin stitches can slip between the weave. By thickening the draft lines to a 2.5mm satin column, I maintained the technical look without sacrificing readability.
The editable text was the real hero here. I swapped the placeholder text for the company’s name, chose a sturdy block font that matched the industrial feel, and converted it to a satin stitch with a narrow zigzag underlay. The result on my test sew-out was crisp, legible, and solid. The eagle’s eye didn’t disappear, and the draft lines registered as a deliberate background pattern rather than a mistake. On a natural canvas tote, the contrast between the dark navy thread and the beige fabric made the Eagle Drafted Contractor Logo pop immediately. I could easily see this same design working on a heavyweight hoodie, a structured apron, or even a 5-panel cap with the right stabilizer.
Where the Design Shines and Where It Demands Caution
This logo graphic is not a one-size-fits-all embroidery solution. It has a clear personality that leans heavily toward the trades, construction, outdoor work, and veteran-owned businesses. If you’re selling on Etsy or at a craft fair, you’ll find a natural audience among contractors, electricians, welders, landscapers, and small construction firms. I’d also see it working well on personalized gifts for a new homeowner, a housewarming tool pouch, or a garage-themed pillow cover. The Eagle Drafted Contractor Logo carries a sense of authority that elevates a simple handmade product into something that feels like a premium brand asset.
However, there are a few situations where I’d approach this design with extra care. First, stretchy fabrics like performance tees or baby onesies need a careful stabilizer strategy. The dense fill of the eagle body can create puckering if the knit isn’t hooped with a firm cutaway backing. Second, the draft lines, while impactful, can become a headache on dark fabric. Without a light underlay or a white base layer, those thin lines might get swallowed by a black or charcoal background. I always test on a scrap of the actual fabric and check the thread contrast in natural light before committing to the final run.
Small hoop sizes are another limitation. If you’re using a 4x4 hoop, you’ll need to scale the design down, which means sacrificing some of the draft line clarity. I’d recommend keeping the design at least 4 inches wide, which puts it comfortably in a 5x7 hoop or larger. For caps, the curved surface and limited sewing field mean you’ll want to simplify the background lines or focus on the eagle and text alone. A cap version might strip the draft lines to just a few bold strokes, keeping the logo recognizable without overcrowding the front panel.
Thread Choices, Stabilizer, and the Import Workflow
Because the original file is a 300dpi vector graphic, not a ready-to-stitch embroidery file, you’ll need to digitize it yourself or work with a digitizer. The high resolution means you can zoom in to inspect every node, which is invaluable when you’re adjusting the stitch angles. I typically digitize the eagle’s fill at a slightly lower density—around 0.35mm spacing—to keep the fabric from becoming too stiff. For the draft lines, I use a light pull compensation to prevent gaps on the canvas or denim. The editable text gives you the freedom to match the company’s font, but I always check the small lettering. If the contractor’s name is long, I might scale the text area slightly or use a condensed font to keep the stitch count reasonable.
Stabilizer choice depends on the end product. For tote bags, I use a medium-weight tear-away with a light spray adhesive. For hoodies, a cutaway is non-negotiable. If I’m turning this into an embroidered patch, I’ll add a stout edge run and use a heavy water-soluble topping on top of the twill to keep the fine details from sinking. The eagle’s beak and eye are tiny but critical—those features define the face, so I’ll reduce the machine speed and watch the stitch formation carefully on the first test.
The Commercial Angle for Craft Sellers
If you’re an Etsy seller or a small shop owner, the Eagle Drafted Contractor Logo can become a versatile design asset, but you must verify the license before selling finished items. Since the description doesn’t explicitly state the commercial use terms, I’d strongly recommend reaching out to the creator to confirm whether you can use the graphic on products you sell. Many vector graphics are sold with personal-use or limited commercial terms, and assuming otherwise can lead to headaches down the road. That said, once cleared, this design can live across multiple product types: embroidered patches, custom work shirts, branded tote bags, trucker hats, and even printed mockups for digital product previews. The editable text makes it easy to create a cohesive branding package for a small business, which is a huge selling point.
I’d also suggest testing the design in black and white before finalizing thread colors. The vector file’s contrast should translate well, but a monochrome mockup will reveal if the draft lines hold their own without color differentiation. That’s a quick check that can save you from a muddy stitch-out on a single-color patch.
Final Stitch Notes from the Hoop
After spending real time with the Eagle Drafted Contractor Logo—digitizing, testing, and imagining it on a dozen different blanks—I’d call it a strong, character-rich graphic that’s ready for thoughtful embroidery adaptation. It’s not the kind of design you drop into a hoop and forget; it rewards a little extra attention to detail, especially around the draft lines and the eagle’s profile. The vector quality and editable text give it a professional edge, and the construction theme closes the gap between a generic logo and a meaningful brand mark.
For embroidery designers building a library of rugged, trade-focused designs, this one earns a spot in the rotation. It works hard on canvas, denim, and structured wovens, and with a few adjustments, it can easily move to caps and patches. Just remember to test on scrap fabric, keep an eye on stitch density, and always confirm your licensing before you send that finished product out the door.